You can change the setting to receive notifications only on the days and times you want.
Use the 'Turn off notifications on holidays' setting to automatically turn off notifications on holidays.
Notification hours setting
Turn on the notification hours function
When you turn on the notification hours function for the first time, you will automatically receive notifications from 7:00 AM to 10:00 PM.
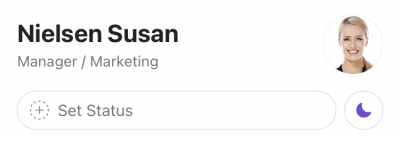
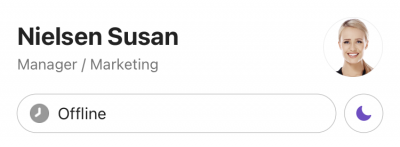
Once the function is turned on, your profile photo on the top right will change to a moon-shaped ![]() icon or 'Quiet Hours' will be displayed outside the set notification hours. If your status is set, your status icon is also displayed.
icon or 'Quiet Hours' will be displayed outside the set notification hours. If your status is set, your status icon is also displayed.
You can set 'Notification hours' even when your device notification setting is deactivated.
Mobile
- Tap 'Home' on the bottom.
- Tap
 .
. - Tap 'Set Notification Hours'.
- Turn on 'Set Notification Hours'.
PC Web
- Click
 on the top right and select 'Settings'.
 - Click 'Notification' in the left menu.
- Click
 on the right of 'Set notification hours'.
 - Turn on 'Enable notifications'.
PC App
- Click your profile photo on the bottom left of the screen.
- Click 'Set notification hours'.
- Turn on 'Set notification hours'.
Add notification hours
You can set multiple notification hours for different days and times.
Mobile
- Tap 'Home' on the bottom.
- Tap .
- Tap 'Set Notification Hours'.
- Tap 'Add hours' at the bottom of the list.
- Select the days you want to receive notifications, and set the 'Starts' time and 'Ends' time.
- Save the changes.
- Android: Tap
 on the top left.
 - iOS: Tap 'Save' on the top right.
- Android: Tap
PC Web
- Click on the top right and select 'Settings'.
- Click 'Notification' in the left menu.
- Click on the right of 'Set notification hours'.
- Click 'Add hours' on the right of the Schedule notifications menu.
- From the 'Notification hours' window, select the days you want to receive notifications, and set the start and end times.
- Click 'Save'.
PC App
- Click your profile photo on the bottom left of the screen.
- Click 'Set notification hours'.
- Click 'Add hours' below the Set notification schedule menu.
- From the 'Notification hours' window, select the days you want to receive notifications, and set the start and end times.
- Click 'OK'.
Edit notification hours
Mobile
- Tap 'Home' on the bottom.
- Tap .
- Tap 'Set Notification Hours'.
- Tap
 on the right of the notification hours to edit.
 - Tap 'Edit'.
- Change the days and times. Then save the changes.
- Android: Tap on the top left.
- iOS: Tap 'Save' on the top right.
- Android: Tap
PC Web
- Click on the top right and select 'Settings'.
- Click 'Notification' in the left menu.
- Click on the right of 'Set notification hours'.
- Click 'Edit' on the right of the notification hours to edit.
- From the 'Notification hours' window, change the days and times, and then click 'Save'.
PC App
- Click your profile photo on the bottom left of the screen.
- Click 'Set notification hours'.
- Click 'Edit' on the right of the notification hours to edit.
- From the 'Notification hours' window, change the days and times, and then click 'OK'.
Delete notification schedules
There must be at least one set notification hours set. The last notification hours set cannot be deleted.
Mobile
- Tap 'Home' on the bottom.
- Tap .
- Tap 'Set Notification Hours'.
- Tapon the right of the notification hours to delete.
- Tap 'Delete'.
PC Web
- Click on the top right and select 'Settings'.
- Click 'Notification' in the left menu.
- Click on the right of 'Set notification hours'.
- Click 'Delete' on the right of the notification hours to delete.
PC App
- Click your profile photo on the bottom left of the screen.
- Click 'Set notification hours'.
- Click 'Delete' on the right of the notification hours to delete.
Turn off notification hours setting
You can turn off notification hours setting to receive notifications at all times.
Mobile
- Tap 'Home' on the bottom.
- Tap .
- Tap 'Set Notification Hours'.
- Turn off 'Set Notification Hours'.
PC Web
- Click on the top right and select 'Settings'.
- Click 'Notification' in the left menu.
- Click on the right of 'Set notification hours'.
- Turn off 'Enable notifications'.
PC App
- Click your profile photo on the bottom left of the screen.
- Click 'Set notification hours'.
- Turn off 'Set notification hours'.
Turn off notifications on holidays
You can set to not receive notifications on holidays for the entire day regardless of the notification hours set.
This function is only available in Korea, Japan, and China.
Mobile
- Tap 'Home' on the bottom.
- Tap .
- Tap 'Set Notification Hours'.
- Turn on 'Turn off notifications on holidays'.
PC Web
- Click on the top right and select 'Settings'.
- Click 'Notification' in the left menu.
- Click on the right of 'Set notification hours'.
- Turn on 'Turn off notifications on holidays'.
PC App
- Click your profile photo on the bottom left of the screen.
- Click 'Set notification hours'.
- Turn on 'Turn off notifications on holidays'.