Create a group.
The Group is a project or task-based business unit, separate from the organizations. Groups are divided into '(internal) Group' and 'External group' depending on its members.
- Internal Group: a group with only the employees of your company
- External group: a group with the combination of external and internal employees
People who are in the group are called members. A group consists of members and the group master who manages them.
Add internal group
Create a group with only the employees of your company.
The administrators can select whether to allow only the administrators or members to create groups from the 'Admin > Service > Contacts > General > Authority to create group'.
- Select 'Member' from the left to expand the menu and press 'Group' to access the page. On mobile, tap the
 button to access the menus.
 - At the top right, press 'Add Group' and then 'Group'.
- Fill the required fields and press 'Add' to complete. You can continue to add groups by pressing the 'Continue to add after saving'.
The following are the descriptions of entry fields in the 'Add Group' window.
- Group information
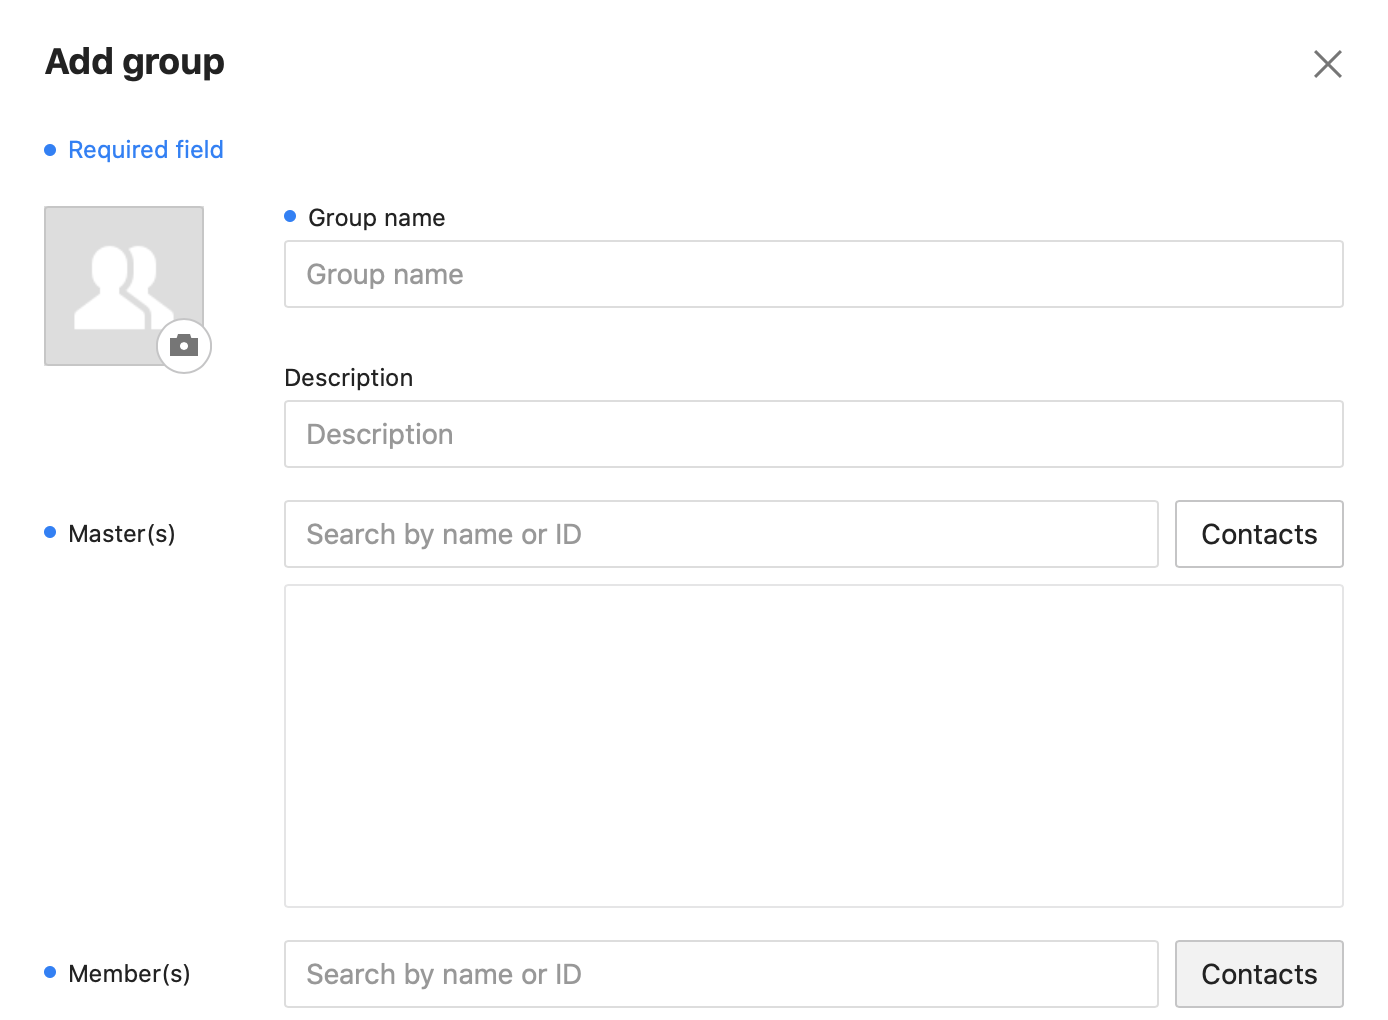
- Representative photo: Tap the camera icon to select a photo for the Group Message Room.
- Group Name (required): Enter up to 100 characters. There are no restrictions on entering special characters.
- Description: Enter a group description.
- Master(s) (required): Assign the group master. You can assign multiple group masters. If the administrator does not restrict the authority of a group master, the following settings are available:
- Whether to use Note, Folder, Event
- Change the group name
- Make group public
- Manage group members: add and delete
- Member(s) (required): Select the member to use the group. You can select members, organizations, and groups.
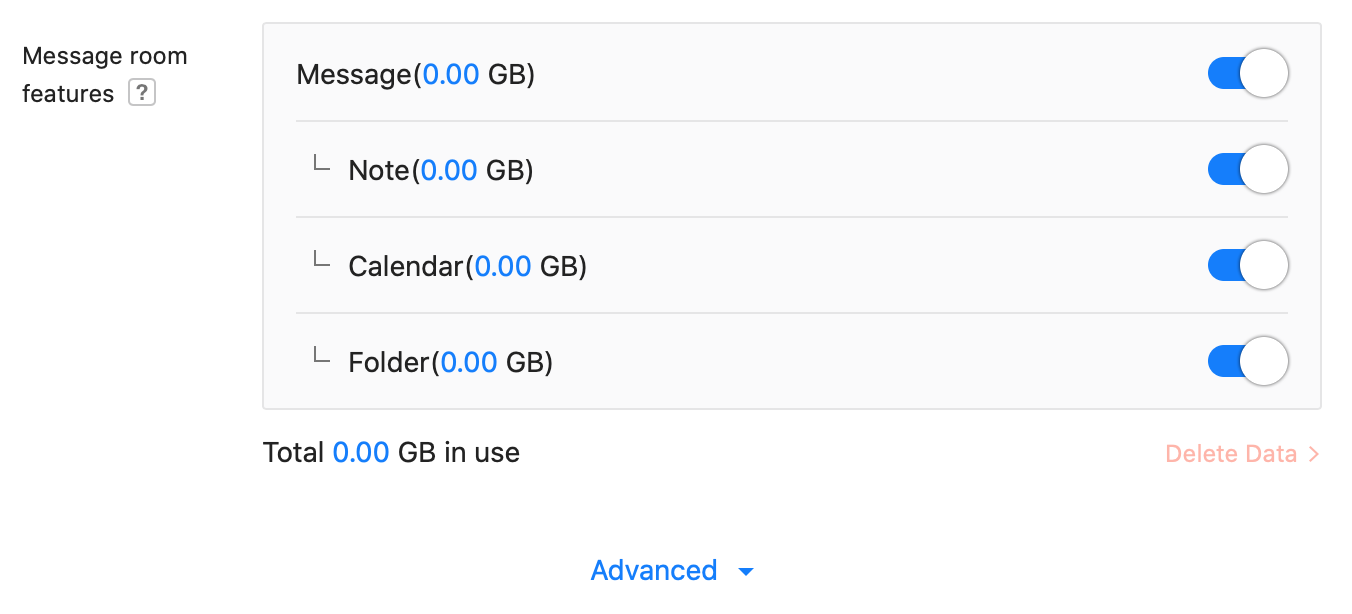
- Message room features
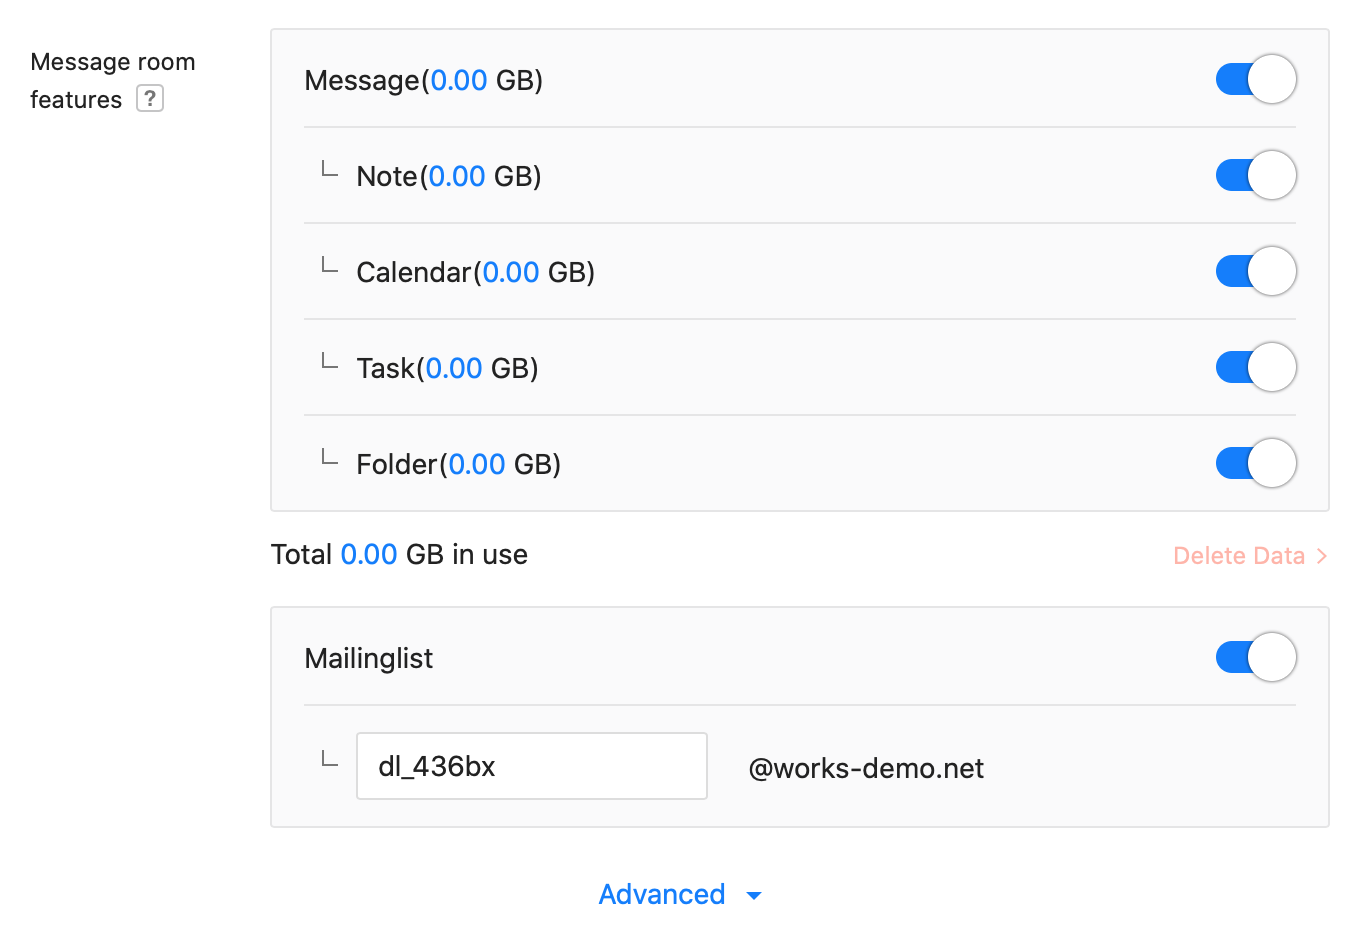
- Message: Select whether to use a message room specifically for the group members. You must turn on Message to use the Group Note, Event, Task, and Folder functions.
- Note: Choose whether to use the Note. With the Note function, group members can share posts with photos and files.
- Event: Select whether to use the Event. Group members can update and share group events on the Event.
- Task: Select whether to use the Task. With the Task function, you can share and manage tasks together with group members.
- Folder: Select whether to use the Folder. Group members can upload, download, and share files with other members.
- Delete Data: You can delete the data of the message room features (Note, Event, and Folder). Data can only be deleted if it exists, and cannot be restored once deleted.
- Mailinglist (Only available for the Advanced plan): Select whether to use the mailing list and enter the address. With the mailing list in use, all members of the group will receive an email that was sent to the mailing list. The mailing list is convenient in that there is no need to edit when adding group members. It can have 2 to 40 characters in a combination of English lowercase letters, numbers, periods (.), hyphens (-), underscores (_), and exclamation marks (!). However, you cannot use email addresses already in use, including email addresses of members, groups, and organizations.
- Message: Select whether to use a message room specifically for the group members. You must turn on Message to use the Group Note, Event, Task, and Folder functions.
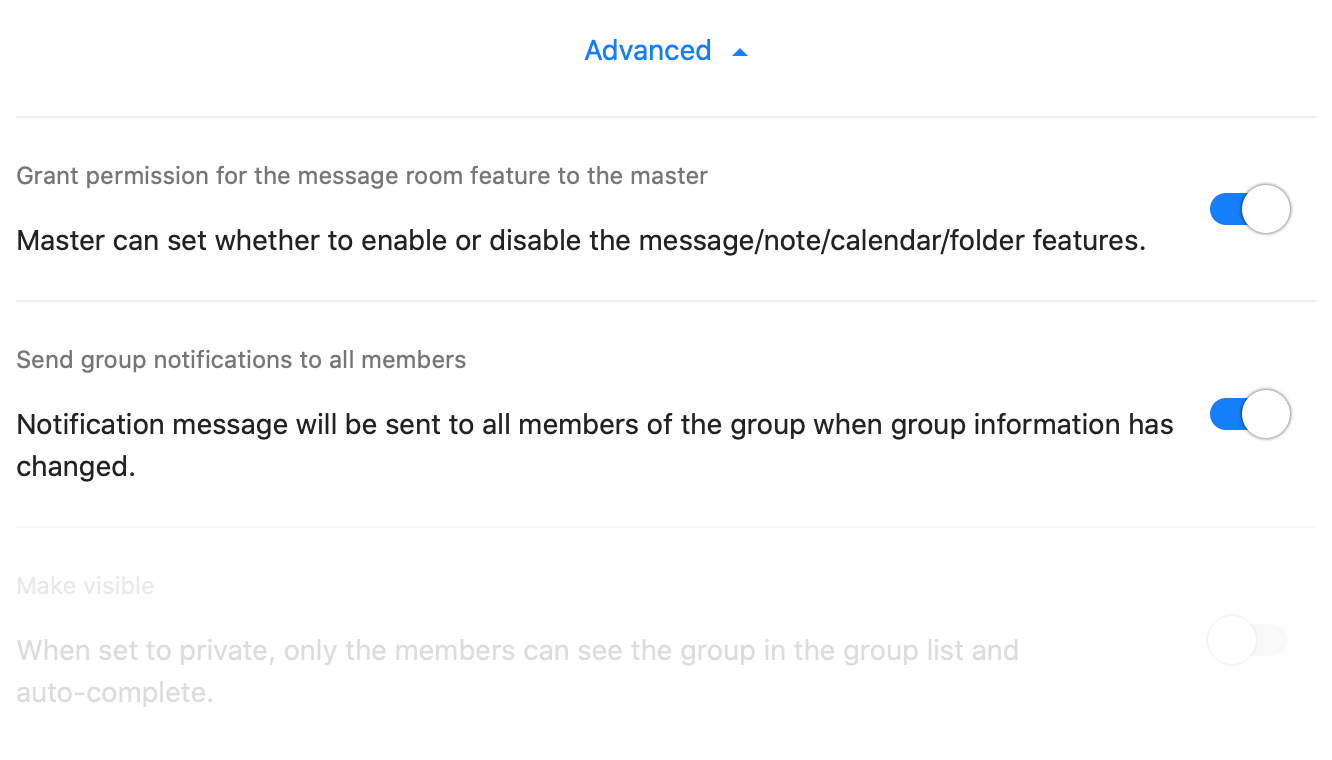
- Advanced
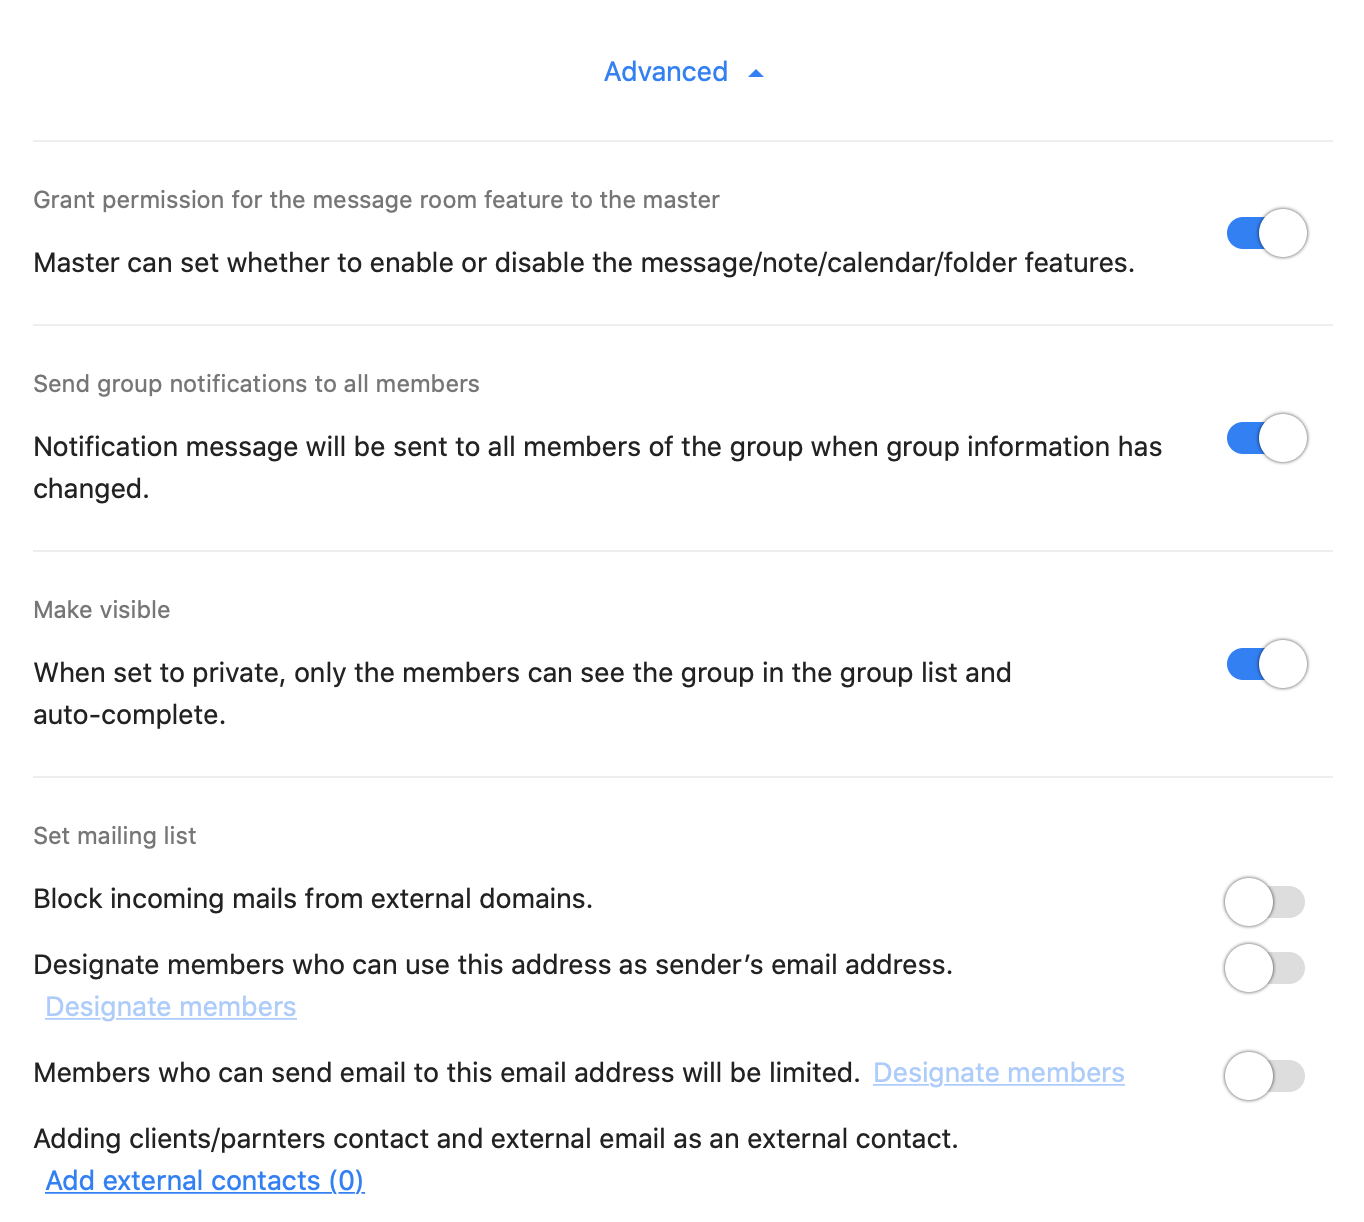
- Grant permission for the message room feature to the master: If set to in use, the master of the group can select whether to use the Message room features such as Message, Note, Event, Folder, and Mailing list.
- Send group notifications to all members: If on, notifications are sent to all members of the organization when members are added or removed, and team functions are turned on or off.
- Make visible: Choose whether to make the group public. There are two types of groups: public and private. Private groups do not appear in the group list, search results, or auto-completes except to the group members. If you turn the 'Make visible' setting on, the selected group becomes public.
- Set mailing list (Only available for the Advanced plan):
- If you block emails of external domains, you will only receive emails from the sender with your company's email addresses.
- If you set an email address that members can send an email with, only the 'Designate members' can use the Mailing list's email address to send emails. When an authorized member sends an email to an email address that receives the mailing list, the other members will automatically receive the Bcc email. When the recipient of the email responds, everyone on the team will receive the email. Administrators can check who actually sent the mail in 'Admin > Audit > Mail'.
- If you limit the members who can send emails, only the members with the authority as 'Designate members' can send emails to the mailing list email addresses.
- You can add the Customers/Clients contacts or external emails as the external contacts on the group mailing list.
Add external group
Create a group that consists of both internal and external employees.
- Select 'Member' from the left to expand the menu and press 'Group' to access the page. On mobile, tap the button to access the menus.
- At the top right, press 'Add Group' and then the 'External group'.
- Fill the required fields and press 'Add' to complete.
- You can continue to add groups by pressing the 'Continue to add after saving'.
- For the new external group, the
 icon indicating the external group and the
  icon meaning private status are displayed.
The following are the list and descriptions of the information you can enter in the 'Add external group' window.
- Group information
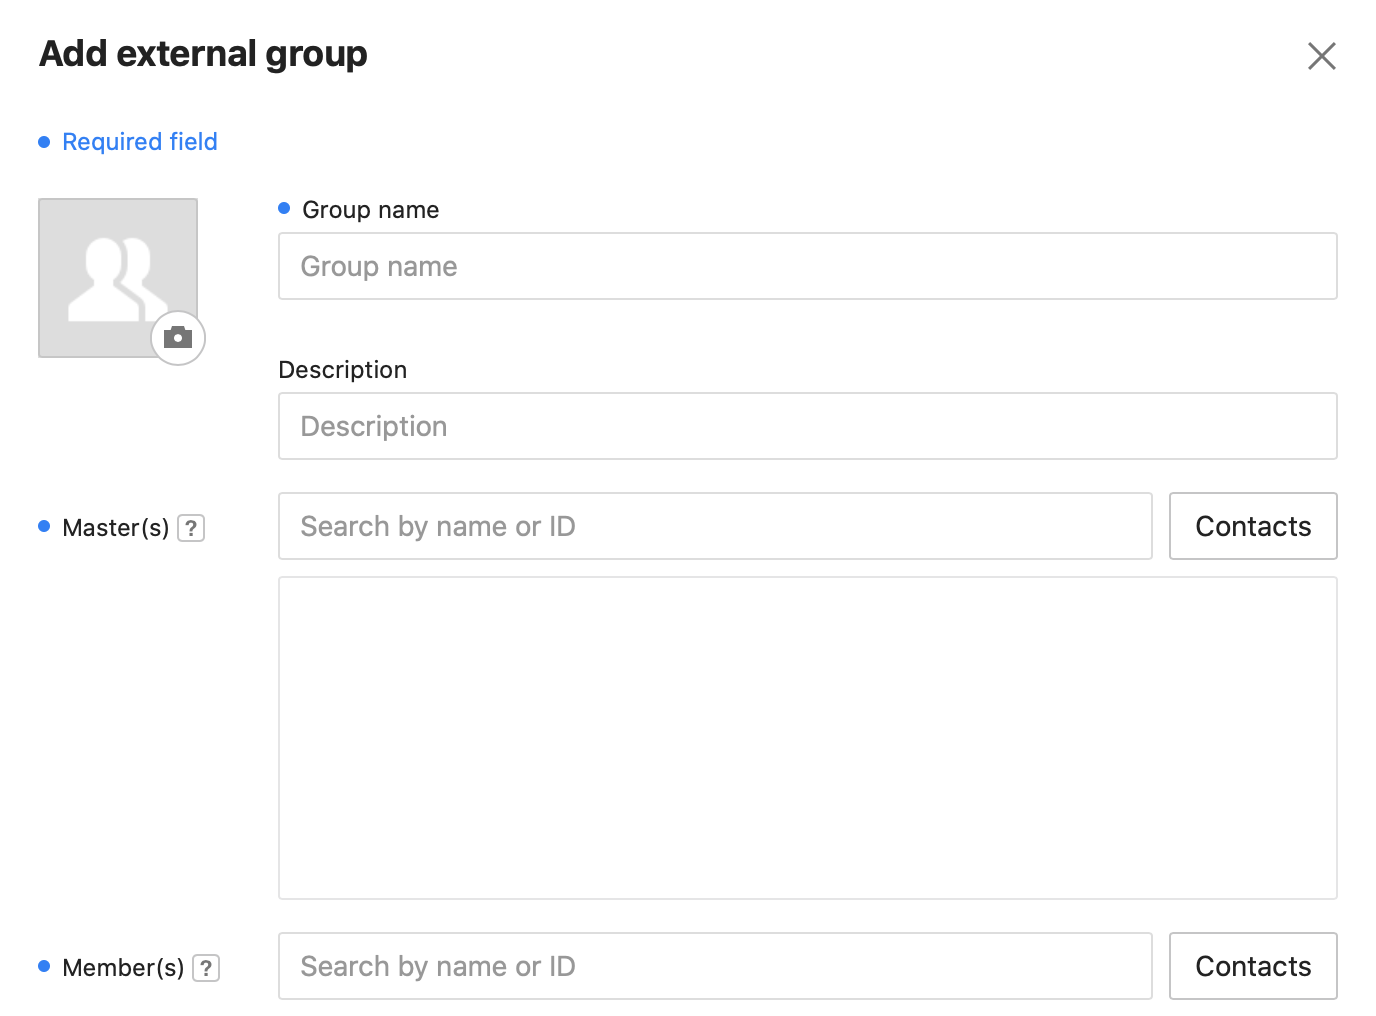
- Representative photo: Tap the camera icon to select a photo for the Group Message Room.
- Group Name (required): Enter up to 100 characters. There are no restrictions on entering special characters.
- Description: Enter a group description.
- Master(s) (required): Assign a group master. The group master must have the authority to 'Connect with outside LINE WORKS' in advance. Multiple group masters can be assigned. If the administrator does not restrict the authority of a group master, the following settings are available to them:
- Whether to use Note, Folder, Event
- Change the group name
- Make group public
- Manage group members: add and delete
- Member(s): Select the members to use the external group. Only the internal members with the 'Connect with outside LINE WORKS' authority can be selected as the external group members. External members, who do not belong to your company, cannot be selected as the external group member from the 'Add Group > External group' page. You can add the external members from the Contacts after the group is created.
- Message room features
- Message: Select whether to use a message room only for the external group members. You must turn on Message to use the Group Note, Event, and Folder functions.
- Note: Choose whether to use the Note. Group members can share posts with photos and files with the Note function.
- Event: Select whether to use the Event. Group members can update and share group events on the Event.
- Folder: Select whether to use the Folder. Group members can upload, share, and download files with other members.
- Message: Select whether to use a message room only for the external group members. You must turn on Message to use the Group Note, Event, and Folder functions.
- Advanced
- Grant permission for the message room feature to the master: If set to in use, the master of the group can select whether to use the group functions such as Message, Note, Event, and Folder.
- Send group notifications to all members: If on, notifications are sent to all members of the organization when members are added or removed, and team functions are turned on or off.
- Make visible: You can only set external groups as private.